I was building a new cluster with a dual instance of SQL 2012 and SQL 2008R2. Everything went easy with the SQL 2012 but not so well with the SQL 2008R2 install. As many have found out installing SQL 2008R2 on Windows Server 2012R2 is met with some strange errors due to the fact that the SQL installer was written long before the server OS. Even though SQL 2008R2 mainstream support ended 7/2014, extended support is still available through 7/2019 and it is still in wide use.
Depending upon your environment you may run into all of these problems.
- “Setup Requires Microsoft .Net Framework 3.5 SP” which needs to be pre-installed before running setup.
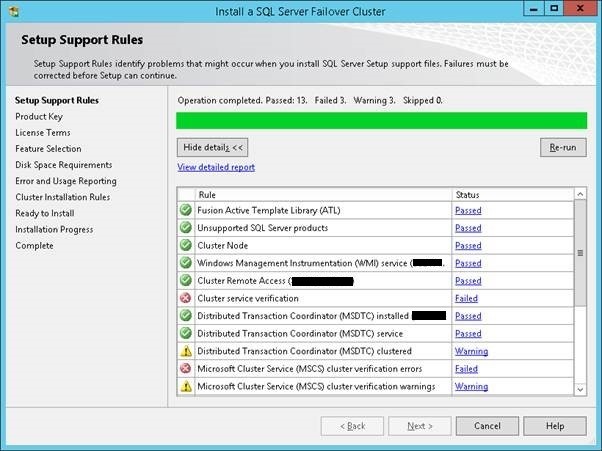
- “Cluster Service Verification” failure as SQL is unable to detect the windows cluster which is fixed by installing a legacy component “Failover Cluster Automation Server”.
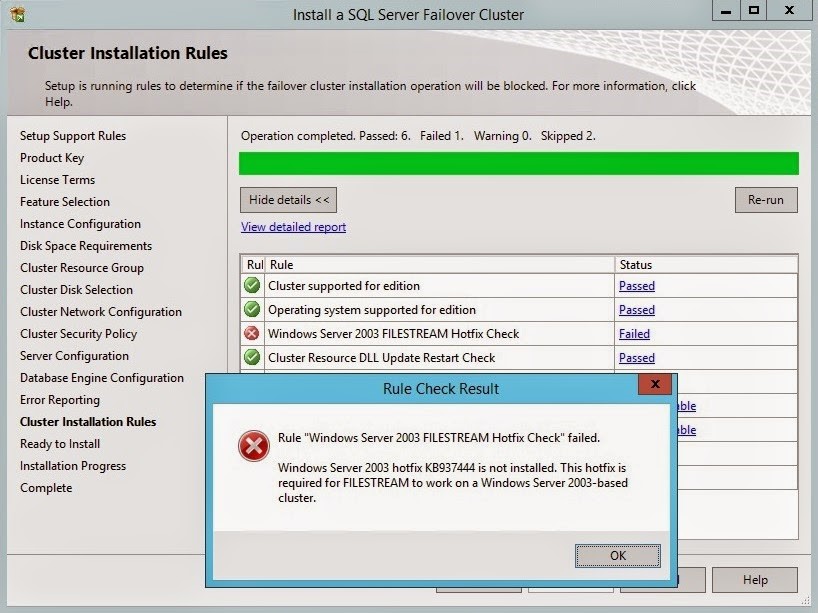
- “Windows Server 2003 FileStream HotFix Check” from installing SQL RTM version which is fixed by creating slipstream install with SP3.
Setup Requires Microsoft .Net Framework 3.5 SP1
On Windows Server 2012R2 the NetFx3 .Net Framework 3.5 feature is not installed however various applications require NetFx3 such as SQL 2008R2 and SQL 2012.
NetFx3 can be installed from the Server Manager GUI but I find the command line option quicker. You will need the original Windows Server source media available in the path specified. See Daniel Classon blog for more information.
[code language=”sql” light=”true”]
dism /online /enable-feature /featurename:NetFX3 /all /Source:d:\sources\sxs /LimitAccess
[/code]
Cluster Service Verification Failed
During the setup support rules check it will fail to detect the cluster because it is using a deprecated way to detect the status of the cluster. In order to get SQL 2008R2 setup to work, you need to install legacy cluster component “Failover Cluster Automation Server” so that the setup can properly detect the existence of the cluster. This can be solved with a simple PowerShell command.
Error encountered upon install of SQL2008R2 on Server 2012R2
Display WFC components and install Failover Cluster Automation Server
[code language=”sql” light=”true”]
Install-WindowsFeature -Name RSAT-Clustering-AutomationServer
[/code]
I found excellent information here that covers the whole topic.
Windows Server 2003 FileStream HotFix Check
If you started the install using SQL 2008R2 RTM version you will make all the way to the last step where you are ready to install the files and you’ll receive an error stating that you don’t have the required Windows 2003 FileStream HotFix installed (on your Windows 2012R2 server?).
Fixing this error requires at least SP1, but you were installing from original RTM distribution and planned on installing the service pack afterwards. Getting around this dilemma involves performing a SQL 2008R2 slipstream install. I modified the instructions I found to make this work with SP3. This SQL 2008R2 SP3 slipstream installer can be used on any future install for any cluster or standalone server.
CREATING SQL 2008R2 SP3 SLIPSTREAM INSTALLER
- Copy original SQL Server 2008 R2 source media to C:\SQL2008R2_SP3
- Download the SQL Server 2008 R2 SP3 for both x64 and x86
- Extract each of the SQL Server 2008 R2 packages to C:\SQL2008R2_SP3\SP
- SQLServer2008R2SP1-KB2528583-x64-ENU.exe /x:C:\SQL2008R2_SP3\SP
- SQLServer2008R2SP1-KB2528583-x86-ENU.exe /x:C:\SQL2008R2_SP3\SP
- Ensure you complete this step for both architectures to ensure the original media is updated correctly
- Copy Setup.exe from the SP extracted location to the original source media location
- Copy all files (not the folders)
- from C:\SQL2008R2_SP3\SP\x86 to C:\SQL2008R2_SP3\x86 to update the original files
- from C:\SQL2008R2_SP3\SP\x64 to C:\SQL2008R2_SP3\x64 to update the original files
- except the Microsoft.SQL.Chainer.PackageData.dll (do not copy this file)
- Determine if you have a DefaultSetup.INI at the following locations:
- C:\SQL2008R2_SP3\x86
- C:\SQL2008R2_SP3\x64
- If you have a DefaultSetup.INI at the above locations, add the following lines to each DefaultSetup.INI:
- PCUSOURCE=”.\SP”
- If you do NOT have a DefaultSetup.INI, create one with the following content: ;SQLSERVER2008 R2 Configuration File [SQLSERVER2008] PCUSOURCE=”.\SP”
- and copy to the following locations C:\SQL2008R2_SP3\x86 C:\SQL2008R2_SP3\x64
- This file will tell the setup program where to locate the SP source media that you previously extracted
- Run setup.exe as you normally would
Future Compatibility Woes
This is not the first time SQL installs presents a compatibly warning when attempting to install on newer versions of Windows Server. Good news is Microsoft seems to have addressed this in SQL 2012 using integrated Slipstream technology within the installer. The installer introduces Product Update functionality automatically into the setup process. However, we’ll have to wait for Windows Server 2018 or 2020 to see how well it works.


